December Mug of the Month Progress Update: Staci Wolfe
- Dec 30, 2025
- 5 min read

Mug of the Month Progress Update:
Coming up with the design of the Winter Sleigh ride was the easy part, bringing it
to life has brought out multiple different challenges.
Challenges: Timing:
Timing is everything with this design, wait a day too late and the walls of
the mug are too dry to attach the handle too without forming cracks.
Attaching the handles involves a lot of slip and that added moisture to the
sides of a mug that’s too dry usually ends with cracks forming.
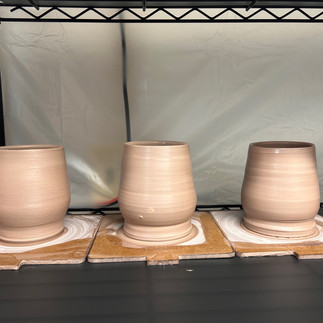
o This design is also one that I have found that I can’t throw all the mugs at
once. I throw them in batches of 6, this way I don’t overwhelm myself with
having all the mugs done at once and two I can guarantee that I can
attach handles to those six before they get too dry.
o The timing that I seem to have the most success with is:
Throw my batch of 6 and put them on my shelf to dry, the next day I
wire them off the bats and create a little lip in the rim for the antler
to rest on. I place them upside down with the rims wrapped in an
extra layer of plastic to prevent them from drying out. About 12hrs
after that they are at a good stage to trim.
Of course, when all the initial drying is going on, I’m making the
handles and placing them in a damp box. So, they are ready to go
when the mugs are finally trimmed.
Once trimmed the first part of the antler handle goes on, I do that
for the entire batch so when I go back and put on the second piece
the actual handle part has stiffened up enough to handle.
I then go through the batch again cleaning up the attachment
points, add in any texture and then add in the final layer of slip to
create that bony white color on the antlers.
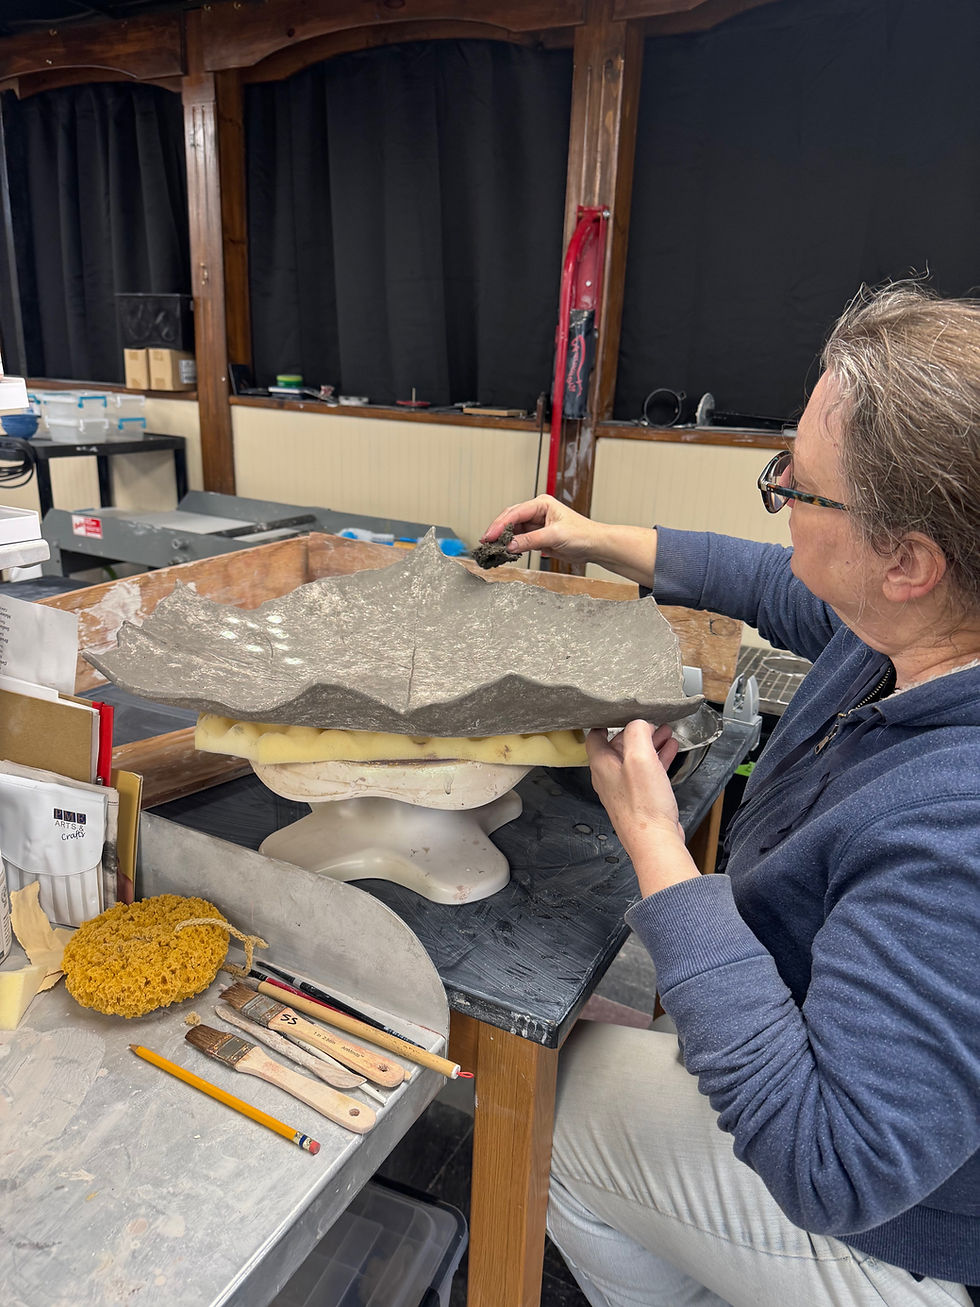
Antler Attachment:
o I didn’t want this to look like any old mug; I wanted it to be different and
interesting but with different and interesting comes the challenge of
attaching the antler handle to the mug. Antlers are bottom heavy and
placing the bottom-heavy part at the bottom of the mug created a very
bottom heavy mug. In an effort to even out the weight of the mug better, I
placed the bottom heavy part of the antler on the top rim of the mug. This
created a more weight distribution.
However, placing a thick antler on a thin rim of mug created a
completely new set of challenges. I found antler handle couldn’t be
placed on the rim of the mug without any support holding it. It would
cause rim of the mug to start collapsing slightly.
I then tried cutting a little piece of the rim and bending it out to form
a ledge for the antler to rest on. This worked but I wasn’t happy with
how the antler flowed into the mug.
From the ledge idea came the pour spout idea. Instead of cutting
out a portion of the rim of the mug, I instead added a pour spout.
This little ledge is enough to support the antler and flow together
better as a whole.
Antler Shape:
o I attempted creating the handles in a few different ways until I found a
method that created the shape, I’m the happiest with.
The first method was just to roll out a snake of clay in the length
needed, add all the points to the antlers and then stick the whole
antler handle onto the mug. This method left the surface of the clay
snake bumpy and not super even, which left me with tons of clean
up work.
The second method was to pull the entire handle, which usually
resulted in the antler being too short and stumpy looking.
The final method that I’m using is to pull just the handle portion and
to roll out snakes of clay for the rest of the pieces of the handle.
Since it’s not on the mug I’m able to clean up the surface of the
antler and add in any texture to the antler before adding it to the
side of the mug.


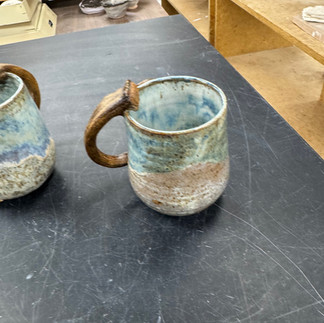
Glaze Color:
o The inspiration for the glaze is freshly fallen snow, something that PA has
gotten quite a lot of this December. The soft fluffy snow that delicately
rests on the branches of trees and shrubs and creates a quiet and muffled
world. That is the look and feeling I am attempting to capture through the
glaze, hues of light blue and white running together to capture those
snowy days.
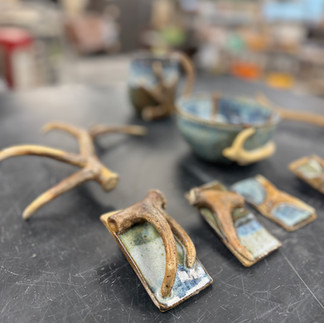
Antler Color:
o My main goal for the color of the antlers is for them to look as natural as
possible. Almost like, it looks like the antlers had just fallen off of the
caribou.
o To achieve this, I looked into using underglazes, washes and slip from a
different clay body.
I had used underglazes before on a different antler mug but I was
never happy with the final outcome or the durability it had. The
underglazes created the matt look I was going for but was too
fragile to stand up the daily abuse the mug endures.
This is where oxide washes came into the picture. I’m able to layer
the washes in a way that adds more depth to the color of the antler
that I could achieve with underglazes and since it’s staining the clay
I’m getting the added bonus of durability.
I’m using Standard's 112 clay for the mugs, I love the rustic natural look of the
speckled brown clay. However, I don’t love it in places on the antler
that need to be white. If you look at a picture of any antler, you’ll
notice they are mostly brown with white spots on the tips of the
antlers and on any rub points. This is where the idea of using a slip
from a white clay body was born (with the help from Septimus). The
base/structure of the antler is 112 and then a very thin layer of Standard's 563
is added on top to help achieve the natural antler look I’m going for.


Mug of the month has presented me with so many new challenges that I wasn’t
expecting and with each challenge that I’m overcoming I can see myself grow as
a potter. I think I’m on about my 10th mug of the month prototype (along with
many other test tiles) and with each prototype I’m changing something/tweaking
something. I can see the vision in my head coming to life, I’m so close and I’m
excited to be able to share it with you all.
~Staci


Comments